Your First Login as an Accountant
What this is
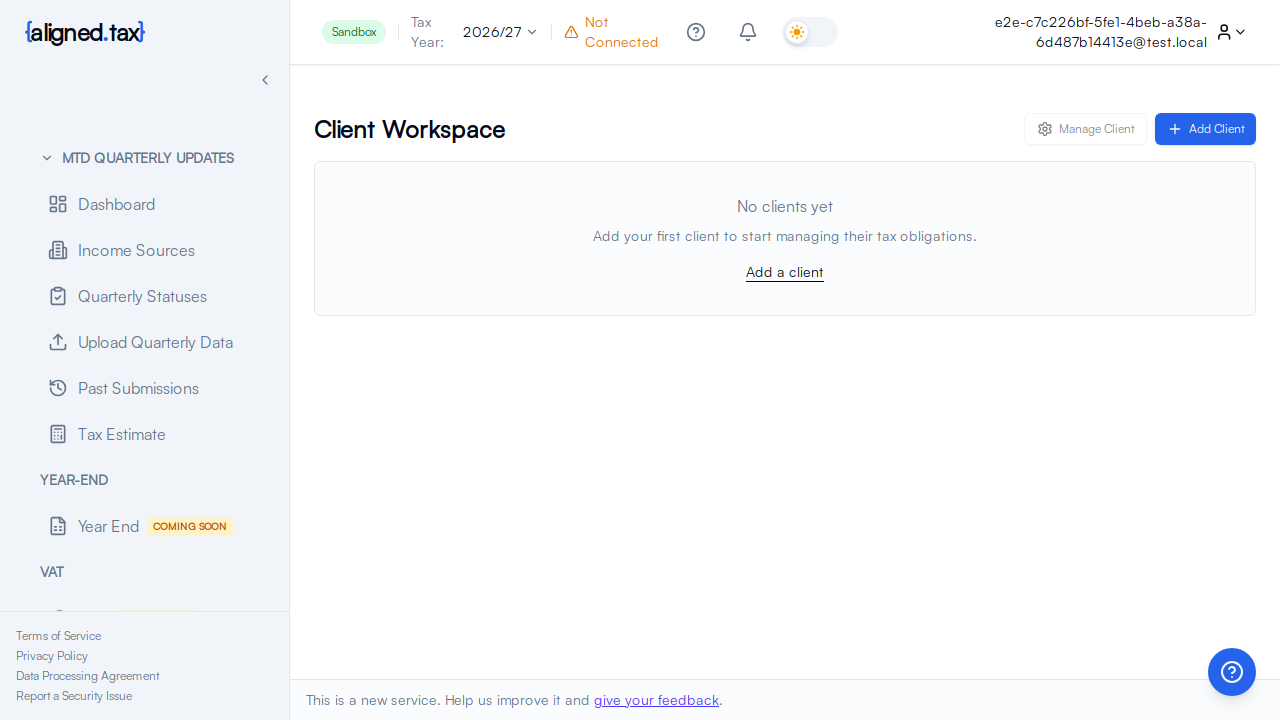
When you first log in as an accountant, you land on the Workspace - your central hub for managing all your clients’ MTD submissions. On your first visit, the workspace will be empty because you have not added any clients yet. This guide walks you through what you see and the steps to get your practice up and running.
What you see on screen
On your first login, the Workspace at /app/workspace shows:
- An empty client list - no clients have been added yet, so the main area will prompt you to add your first client
- The sidebar on the left with navigation sections including MTD Quarterly Updates, Year-End, and your practice tools
- The header at the top with the Aligned logo, your tax year selector dropdown, notifications bell, and the help assistant icon
The sidebar includes these key items for your practice:
- Dashboard - your personal overview
- Income Sources - manage business income sources across clients
- Quarterly Statuses - see obligation statuses for your clients
- Upload Quarterly Data - upload spreadsheets for your clients
- Past Submissions - view submission history across your client base
- Tax Estimate - in-year tax calculation
How to get started
Follow these steps to set up your practice in Aligned:
Step 1: Add your first client
- Look for the Add Client option - you can find it in the Clients section or from the workspace prompt
- Enter your client’s details including their name and NINO (National Insurance Number)
- Save the client
Step 2: Set up your Agent Reference Number (ARN)
Your ARN is the reference number HMRC uses to identify your practice. You need it to authorise yourself to act on behalf of your clients.
- Go to your account settings
- Enter your ARN
- This is a one-time setup for your practice
Step 3: Authorise your client with HMRC
Before you can submit returns for a client, you need to be authorised to act on their behalf through HMRC.
- Navigate to the client you just added
- Start the HMRC authorisation process
- Your client will need to confirm the authorisation through their own Government Gateway account
- Once authorised, the client’s status will update and you can begin uploading data and submitting returns
Step 4: Upload your first spreadsheet
Once your client is authorised:
- Go to Upload Quarterly Data in the sidebar
- Select the client you want to upload for
- Upload an Excel file (.xlsx) - or download the pre-formatted template first
- Use Smart Map to match your spreadsheet columns to HMRC fields
- Review and submit
Things to know
- ARN is essential. Without your Agent Reference Number, you cannot authorise with HMRC to act on behalf of your clients. You can find your ARN on your HMRC Agent Services account.
- Authorisation takes time. HMRC authorisation can take up to 7 days to process. Plan ahead when onboarding new clients.
- You can add multiple clients. There is no limit to the number of clients you can manage through your Aligned practice account.
- The tax year selector in the header controls which tax year’s data you see across the entire app. Make sure it is set to the correct year when uploading or reviewing data.
FAQ
Where do I find my ARN?
Your Agent Reference Number is available from your HMRC Agent Services account at gov.uk. It is a unique reference that identifies your practice.
Can I import my client list from another system?
Currently, clients need to be added individually. Bulk import may be available in future.
What if my client has not authorised me yet?
You can still add the client and enter their details. The authorisation step can be completed later. Until authorised, you will not be able to upload data or submit returns for that client.